Introduction
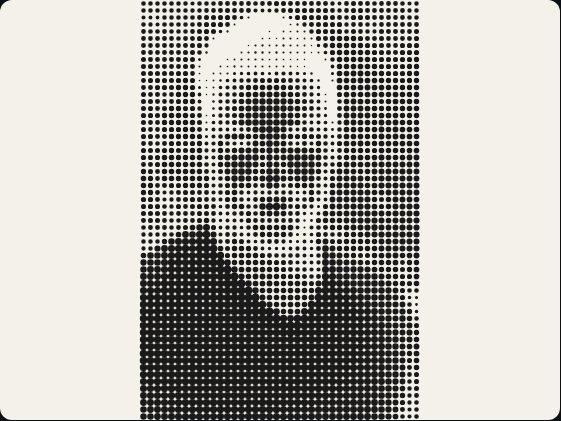
In January 2026, a Codrops tutorial called Efecto showed how to dissolve a photograph into a shifting cloud of dots. By the summer, "viral dithered website effect" tutorials were everywhere: a portrait breaking apart into coarse black-and-white grain, a logo built from ASCII characters that breathe, a hero image that only sharpens where the cursor passes.
I get the same question every week: how do I put that on my site without shipping a 3 MB video? This article answers it twice. First the theory and 40 lines of canvas you can paste into any page. Then the generator I have just published, which does the same job in thirty seconds, animation and mouse interaction included.
To understand the algorithm, read on. For the effect on your page today, jump to the generator.
1. What dithering actually is
Dithering is a lie that works. You have two colours available and you need to show two hundred. Rounding every pixel to the nearest of your two colours gives flat, banded blocks. Dithering instead scatters the rounding error across neighbouring pixels, so that at normal viewing distance the eye averages the dots back into a shade that was never really there.
Newspapers did this mechanically for a century, and the Game Boy did it in software, faking four shades of green into something that reads as depth.
Ordered dithering (Bayer)
A fixed matrix of thresholds — 2×2, 4×4, 8×8 — is tiled over the image, and each pixel is compared with the threshold under it, then turned on or off. It is stateless: the pixel at (10, 4) does not care about its neighbours. Hence the speed, hence the fact that it is the only realistic option at sixty frames a second, and hence the regular cross-hatch texture people associate with the retro look.
Error diffusion (Floyd-Steinberg, Atkinson)
Round a pixel, measure how wrong you were, then push that error onto the neighbours you have not processed yet. Floyd-Steinberg spreads all of it over four neighbours. Atkinson — written at Apple for the original Macintosh — spreads only three quarters: a little less contrast, cleaner whites. The result is organic and grain-like, with no visible grid. The cost is that it is sequential: every pixel depends on the one before, so it does not parallelise and animating it gets expensive fast.
Bayer for anything that moves. Error diffusion for a still frame you can afford to compute once. That single decision explains most of what follows.
2. Why the look came back in 2026
Three things happened at once, and none of them is nostalgia on its own.
- Everything started looking the same. Four years of glass cards, gradient mesh and rounded-corner SaaS heroes. A dithered image is loud in a way that reads as deliberate rather than lazy.
- The platform caught up. Rewriting a full frame with
getImageDataused to stutter. On a 2026 laptop, a 600×400 canvas dithered every frame costs a fraction of a millisecond — a party trick in 2015, a background layer today. - Low fidelity became a signal of taste. The same instinct that brought back film grain and brutalist layouts. A one-bit image says "I know what I am doing with contrast", in a few kilobytes rather than a hero video.
3. Three places it earns its keep
A portfolio hero that reveals itself
The strongest use I know: dither the hero image heavily, then let the original photo appear cleanly under the cursor. The visitor lands on an abstract texture, moves the mouse out of curiosity, and discovers the picture. It rewards a gesture instead of demanding a scroll. On touch there is no cursor, so plan the fallback.
A logo that is alive without being animated
Drop in a transparent PNG of your logo, pick a coarse grain, add a slow breathe or scan animation. You get a mark that moves at the edge of perception — good in a footer or a loading state, where a full animation would be too much and a static logo dead weight.
A section background nobody has to load
Dither a texture or a block of text, set a low-contrast palette, use it as a section backdrop. The output is generated in the browser from a small source, so you never pay for a large background image — and it stays sharp at every viewport width, because the grain is computed rather than scaled.
4. Bayer dithering in 40 lines of canvas
Here is the whole thing, with no dependencies. Add a <canvas id="dither"></canvas> to your page, point the script at an image, and you have ordered dithering.
// 4x4 Bayer matrix: 16 ordered thresholds, tiled over the whole image.
// Stateless, so it is cheap enough to run on every animation frame.
const BAYER4 = [
  [ 0,  8,  2, 10],
  [12,  4, 14,  6],
  [ 3, 11,  1,  9],
  [15,  7, 13,  5]
];

const canvas = document.querySelector('#dither');
const ctx = canvas.getContext('2d', { willReadFrequently: true });
const img = new Image();
img.crossOrigin = 'anonymous';  // needed if the file sits on another domain
img.src = 'photo.jpg';

img.onload = function () {
  // 1. Downscale first: this is what sets how coarse the grain looks.
  const scale = 4;              // one dithered dot = 4 screen pixels
  const w = Math.floor(img.width / scale);
  const h = Math.floor(img.height / scale);
  canvas.width = w;
  canvas.height = h;
  canvas.style.width = img.width + 'px';
  canvas.style.imageRendering = 'pixelated';  // keep the dots hard-edged
  ctx.drawImage(img, 0, 0, w, h);

  // 2. Read the pixels back out of the canvas.
  const frame = ctx.getImageData(0, 0, w, h);
  const px = frame.data;

  for (let y = 0; y < h; y++) {
    for (let x = 0; x < w; x++) {
      const i = (y * w + x) * 4;
      // Luminance, weighted the way the eye reads red, green and blue.
      const lum = 0.299 * px[i] + 0.587 * px[i + 1] + 0.114 * px[i + 2];
      // 3. Compare with the threshold of this cell, rescaled to 0-255.
      const threshold = (BAYER4[y % 4][x % 4] + 0.5) * 16;
      const v = lum > threshold ? 255 : 0;
      px[i] = px[i + 1] = px[i + 2] = v;  // pure black or pure white
    }
  }

  ctx.putImageData(frame, 0, 0);  // 4. Paint the dithered pixels back.
};
The three knobs that matter
scale— the only setting that changes the character of the result. At 2 you get a fine newsprint grain, at 8 chunky Game Boy blocks.- The matrix size — swap the 4×4 for an 8×8 Bayer matrix and the texture becomes smoother and less obviously gridded.
- The palette — the snippet snaps to pure black and white. Replace the two output values with any pair of colours and you have the amber terminal or the paper look.
What the snippet deliberately leaves out is everything that makes the effect feel alive: the animation loop, cursor interaction, error diffusion, ASCII output, palettes. That is a few hundred more lines — exactly what the generator writes for you.
5. The same effect in thirty seconds
I built the Dither & ASCII generator because the existing tools stop one step too early. ASCII Magic, Dither Boy, ditherit and DotForge all turn an image into a dithered file — a PNG, a GIF, an MP4. None gives you a living component that animates in the page and reacts to the visitor.
Three steps:
- Drop in your image — a photo, a logo, or type a line of text for a pure ASCII treatment.
- Choose the treatment — Bayer, Floyd-Steinberg, Atkinson, halftone, lines or ASCII, then a palette: mono, paper, amber, terminal, cyan, Game Boy, CGA or neon.
- Bring it to life — an animation (flow, breathe, scan, noise, rain) and a mouse behaviour (reveal, repel, attract, ripple). Reveal is the one that shows the clean photo under the cursor.
The preview, every setting and the PNG export are free, with no account. Premium unlocks one thing: the code export, a self-contained HTML block of around 15 KB, no dependencies, that you paste into any page.
Preview, settings and PNG export cost nothing. Only the one-block HTML export is Premium.
6. Performance and accessibility
Dither at the resolution of the grain
The cost is proportional to the pixels you process, and the downscale in step 1 is your budget control. A 400×300 canvas stretched across a 1600 px hero costs a quarter of an 800×600 one, and at a coarse grain the difference is invisible. Never dither at screen resolution.
Pass willReadFrequently
Getting the 2D context with { willReadFrequently: true } tells the browser you will call getImageData repeatedly, so it keeps the backing store where those reads are cheap. Forgetting it is the most common reason an animated dither stutters.
Respect prefers-reduced-motion
Flow, noise and rain are exactly the continuous background movement that causes discomfort for some visitors. Wrap the loop in a check and render one static frame instead. The look survives without motion — that is the point of a texture rather than a video.
Mobile, and the canvas is decoration
Cursor modes have nothing to hook onto on a touch screen: either settle on a good static frame, or move the interaction point along a slow automatic path. And anything a search engine or a screen reader must read — your name, your headline, your wordmark — belongs in real HTML on top, with aria-hidden="true" on the canvas.
Frequently asked questions
What is the difference between dithering and halftone?
Halftone is one family of dithering, the one printers use: dots of varying size on a regular grid, which is why a newspaper photograph looks the way it does under a magnifier. Dithering is the wider idea of faking shades with a limited palette — by varying dot size, by tiling thresholds (Bayer) or by pushing error around (Floyd-Steinberg).
Will a dithered canvas hurt my Core Web Vitals?
Not if you size it properly. The canvas element is a few bytes of HTML, and the source image can be small because you downscale it anyway. The risk is layout shift, not weight: give the canvas explicit dimensions in CSS so it reserves its space before the script runs.
Does it work on a transparent PNG logo?
Yes, and it is one of the better uses. Read the alpha channel alongside the luminance and treat fully transparent pixels as "off", so the grain follows the shape of the mark instead of filling a rectangle. In the snippet above, add a check on px[i + 3].
Is the Effect.Labs dither generator free?
Yes: upload, every algorithm, every palette, every animation and the PNG export, with no account. Premium unlocks one thing — exporting the effect as a self-contained HTML block for your own site.
Conclusion
Dithering is old, cheap and, right now, genuinely useful. The reason to use it is not the retro reference but the economics: a texture computed in the browser weighs nothing, scales to any viewport, and reacts to the visitor in a way a background image never will.
Take the snippet above to get the principle into your hands. When you want the animation, the cursor reveal and the palettes without writing the other few hundred lines, the generator is one click away.
Dozens of glitch, grain and distortion effects are ready to copy in the Effect.Labs library, with live preview and vanilla code.